Introduction to DIY Cat Trees
DIY cat tree plans can turn into a fun project for pet owners. They provide a personalized space for your feline friends to climb, play, and rest. A homemade cat tree is often a cost-effective alternative to store-bought ones. Plus, they can match your home decor perfectly.
Crafting a cat tree requires some basic tools and a bit of creativity. This guide will walk you through the process. It will cover everything from selection of materials to the final assembly. By building your own cat tree, you can ensure it fits your space and meets your cat’s needs. Whether you’re a novice or a handy person, your cat will appreciate the effort. So, grab your tools, and let’s get started on creating a playground for your pet.
Required Tools and Materials
To build your DIY cat tree, gather the tools and materials first. Here’s what you’ll need:
- Measuring Tape: To measure lengths and areas precisely.
- Saw: For cutting wood to the right size.
- Drill: Needed for making holes and fastening parts together.
- Screws and Nails: Essential for constructing a sturdy frame.
- Hammer: For driving nails into wood.
- Staple Gun: To attach fabric securely.
- Carpet Knife: To cut carpets or fabrics to cover the tree.
- Plywood Sheets: The base material for platforms and bases.
- Posts: Could be PVC pipes or wooden dowels for the structure.
- Carpet Scraps: For a soft covering that cats love.
- Rope: Sisal rope works well for scratching posts.
- Glue: Non-toxic, strong adhesive for extra strength.
- Sandpaper: To smooth out any rough edges.
Before you purchase, check what you already own. Sometimes, you can recycle materials like old carpeting. Also, safety gear like gloves and goggles protect while working. Plan and buy smart to save money and stay safe.
Choosing the Right Location for Your Cat Tree
Selecting an ideal location is crucial for a DIY cat tree. Cats love to perch and observe their environment. So, pick a spot by a window. This allows them to gaze outside. Avoid placing the tree in busy walkways. You don’t want it to become an obstacle. Corners are great for stability. They also save space in the room.
Look for an area away from fragile items. Your cat might knock things over when jumping around. Make sure the location is away from direct heat sources. This keeps your cat safe and comfortable. Remember, the spot must be cat-approved. It should intrigue and encourage your cat to explore. Find a balance between integration with your decor and your pet’s needs.
Planning Your Cat Tree Design
When you delve into DIY cat tree plans, planning is key. Start by sketching your design. Ensure it includes various levels and platforms. Each level is a new adventure for your cat. Think about incorporating areas for climbing, scratching, and resting.
- Height Matters: Cats love high places. Aim for a design that stretches upwards, within your space limits.
- Stable Base: The base must be solid to prevent tipping. Make it wide and heavy.
- Play Features: Consider ledges, hideaways, and dangling toys. These keep cats entertained.
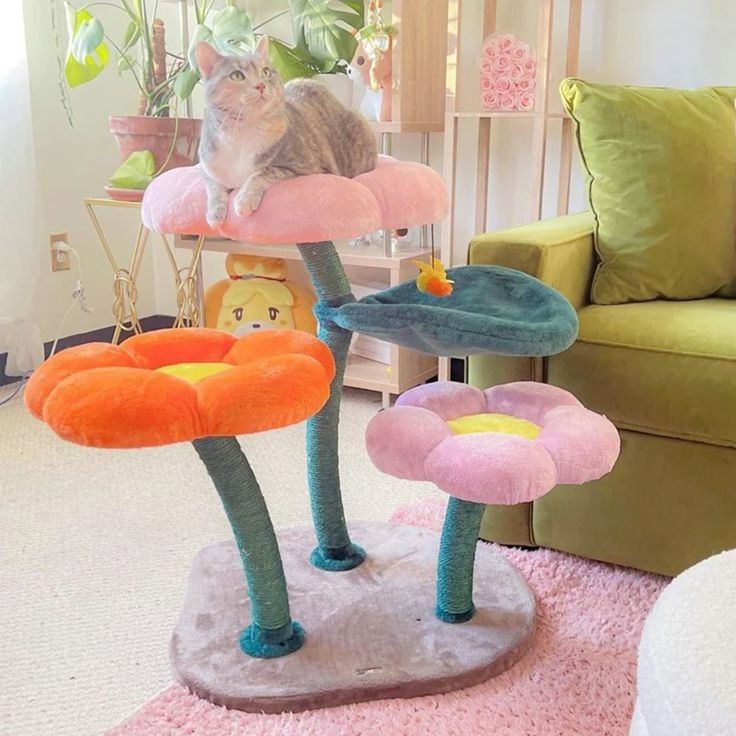
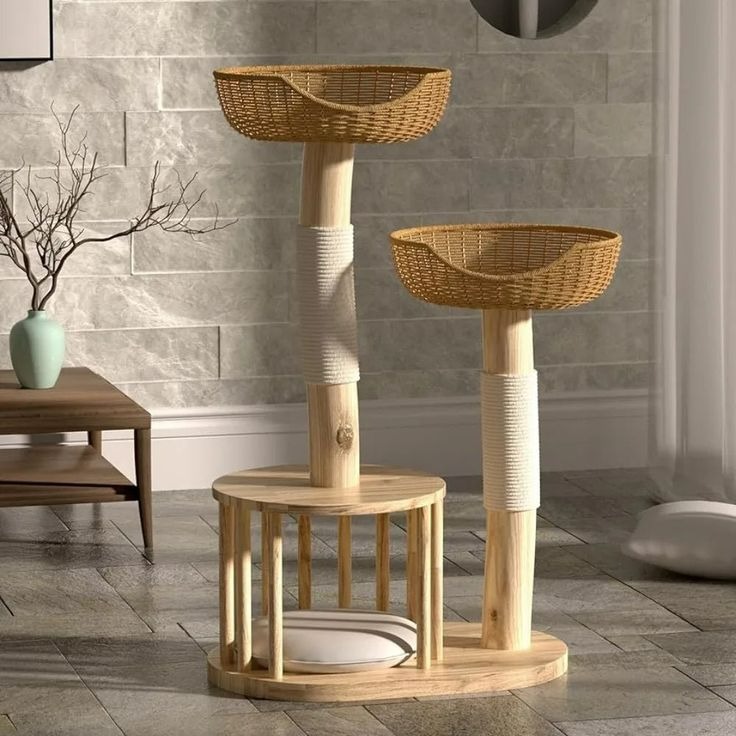
- Resting Spots: Include cozy nooks or hammocks. They offer comfort after play.
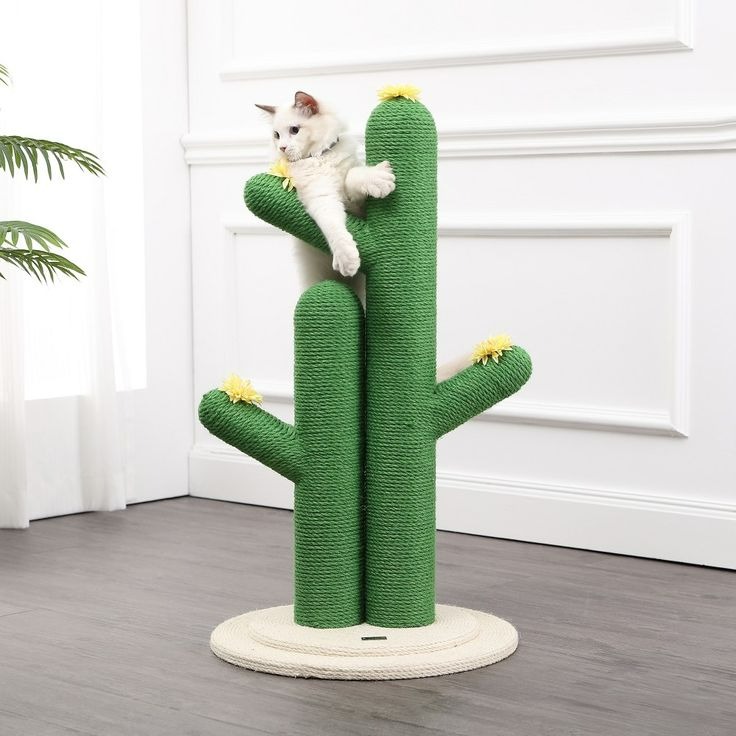
- Scratching Posts: Wrap posts with sisal rope. It will satisfy your cat’s scratching urges.
Visualize your cat’s behavior. Design with their habits in mind. For example, if they love to climb, a tall cat tree with several tiers might be ideal. If they enjoy lounging, focus on providing ample resting areas with soft cushions.
Lastly, review your design against your space. Ensure it blends with your home. Check the design for easy access and safe egress. This helps your cat enjoy the tree more. Remember to leave room for adjustments as you build. Your DIY cat tree plans must be flexible to adapt to your and your cat’s needs.
Step-by-Step Assembly Instructions
Once you have all your tools, materials, and a planned design, it’s time to start assembling your DIY cat tree. Follow these step-by-step instructions to create a sturdy and enjoyable cat tree for your feline friend.
- Cut the Materials: Begin by cutting the plywood and posts to the required sizes using your saw. Always double-check measurements before cutting.
- Assemble the Base: Start with the base, ensuring it’s wide and heavy to prevent tipping. Use screws and a drill to fix the plywood sheets together firmly.
- Attach the Posts: Secure the posts to the base with screws. If using wooden dowels, drill pilot holes to make screwing easier. For PVC pipes, you might need to use glue as well.
- Wrap the Posts: Cover the posts with sisal rope for scratching. Start from the bottom, applying glue as you go, and make sure it’s wrapped tightly.
- Create Platforms: Fix the cut plywood pieces on top of the posts to create levels. Use screws to ensure they’re stable and can support your cat’s weight.
- Cover with Carpet: Use a staple gun to attach carpet scraps to the platforms and base. Cut the carpet to size with a carpet knife for a neat fit.
- Add Play Features: Attach any ledges, hideaways, or toys you planned for. This could involve additional cutting, drilling, and fastening.
- Sand Down Rough Edges: Use sandpaper to smooth out any sharp or rough areas. This prevents splinters and ensures the safety of your cat.
- Final Inspection: Go over the entire structure to check for any loose parts or sharp edges. Tighten all screws and ensure it’s safe for your cat to climb.
Safety Considerations for DIY Cat Trees
When building DIY cat tree plans, safety comes first, both for you and your pet. Here are important tips to ensure a safe construction and use of your homemade cat tree.
- Wear Protective Gear: Always wear safety goggles, gloves, and a dust mask while cutting or sanding wood.
- Secure Materials: Double-check that all screws, nails, and other fixtures are tight to prevent wobbling or collapse.
- Choose Non-Toxic Materials: Use non-toxic glue, stains, or paints on any part of the cat tree. Cats might chew or lick surfaces.
- Sturdy Construction: Ensure the cat tree is balanced and stable. Test it thoroughly before letting your cat use it.
- Smooth Edges: Sand down any sharp corners or exposed nail heads. This helps prevent injuries to your cat.
- Check Regularly: After assembly, inspect the cat tree regularly for signs of wear or loose components.
- Proper Placement: Place the cat tree in an area far from potential dangers like open windows or appliances.
Remember, while you want to have a creative and fun build, your cat’s safety should always be the priority. Keep these considerations in mind to create a safe and enjoyable environment for your furry friend.
Customizing Your Cat Tree
Once your basic DIY cat tree structure is up, customization is where you add unique touches. This is the fun part where you tailor it to your cat’s preferences and your aesthetic tastes. Start by considering the colors and textures that will please both you and your pet. Here are some customization ideas:
- Choose Fabrics and Colors: Pick out carpeting or fabric that not only feels good but also complements your home decor. Go for colors that blend in or stand out based on what you prefer.
- Add Special Features: Think about incorporating a small shelf for catnip, toys, or even a feeding station if you want to go the extra mile.
- Incorporate Fun Toys: Hanging toys or balls from different levels can provide endless fun. Be mindful of safety, ensuring toys are securely attached.
- Personalize with Name Plates: If you enjoy personal touches, add a name plate with your cat’s name on it. This could be placed on the base or a particular level of the tree.
- Integrate Plants: Safety approved plants near the cat tree can bring a touch of nature inside. Make sure these are cat-friendly to avoid any health risks.
- Adjust the Heights: If your cat is older or less mobile, consider the heights of platforms. Perhaps add more steps or lower resting areas.
Remember, while customization adds character to your DIY cat tree plans, always consider durability and safety. Materials used should endure your cat’s playful antics and be safe for them to interact with. Regularly check any added features for signs of wear or loose parts, and adjust as needed to ensure ongoing safety.
Maintenance and Cleaning Tips for Your Homemade Cat Tree
Keeping your DIY cat tree clean and well-maintained is vital for your cat’s health and the longevity of the tree. Cats are clean animals by nature, and a clean cat tree is essential for their happiness and well-being. Here are simple, practical tips to help you maintain and clean your cat tree.
- Regular Inspection: Check for loose screws or frayed materials once a month. Tighten and replace as needed.
- Vacuum Often: Use a hand vacuum to remove fur and dirt from the carpet and platforms weekly.
- Spot Clean Spills: Clean up spills quickly with a damp cloth and mild detergent. Avoid harsh chemicals.
- Wash Fabric: If your cat tree has removable fabric, wash it according to the care instructions.
- Replace Worn Parts: Swap out sisal rope or carpet pieces when they show signs of wear.
- Lint Roller: Run a lint roller over the tree’s surfaces to pick up lingering hair and dust.
- Odor Control: Sprinkle baking soda on the cat tree, let it sit, then vacuum it off to manage odors.
- Check Stability: Ensure the tree remains stable and secure for your cat to play on.
By following these basic maintenance and cleaning tips for your DIY cat tree plans, you not only create a pleasant environment for your cat but also ensure the cat tree remains a durable and safe space for years to come.