I. Introduction
The Joy of Bird Watching in Your Backyard
Bird watching is a delightful hobby that brings joy and tranquility to many. There’s something truly magical about observing these feathered creatures in their natural habitat, fluttering around and filling the air with their melodious songs. For many, the backyard offers the perfect sanctuary for bird watching. By setting up bird feeder pole, you can attract a variety of species, turning your outdoor space into a vibrant aviary. Not only does this provide endless entertainment, but it also helps support local bird populations.
The Benefits of DIY Bird Feeder Poles
Creating your own bird feeder poles is a rewarding and practical endeavor. It allows you to customize the feeders to suit your garden’s aesthetics and the needs of the birds you wish to attract. DIY bird feeder poles can be more cost-effective than purchasing pre-made ones, and they offer a sense of accomplishment. Additionally, homemade poles can be designed to provide greater stability and durability, ensuring that they withstand various weather conditions and the test of time.
Overview of the Guide
This guide will walk you through the process of creating two types of bird feeder poles: a simple wooden pole and a tree branch bird feeder pole. Each section will provide detailed instructions, a list of necessary materials, and tips to ensure the stability and longevity of your bird feeder poles.
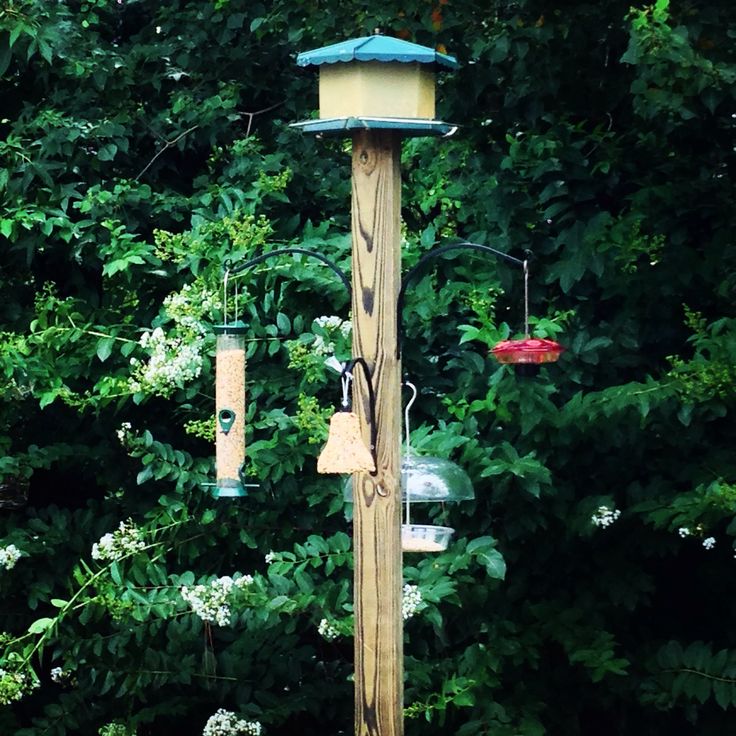
Ⅱ.Simple Wooden Pole
Materials Needed
- Wooden pole (6-8 feet tall)
- Metal or wooden stake (for securing the pole in the ground)
- Screws and a screwdriver
- Bird feeders
- Drill
- Saw (if adjustments to the pole’s length are needed)
- Paint or sealant (optional for weatherproofing)
Step-by-Step Instructions
- Select the Wooden Pole: Choose a sturdy wooden pole, approximately 6-8 feet in height. Ensure the wood is treated or suitable for outdoor use to prevent rot.
- Cut to Desired Length: If the pole is too long, use a saw to cut it to the desired height.
- Secure the Pole: Dig a hole in your desired location, about 2 feet deep. Insert the metal or wooden stake into the hole and fill it with soil to secure it. Attach the wooden pole to the stake using screws and a screwdriver, ensuring it is firmly in place.
- Drill Holes for Feeders: Use a drill to create holes at varying heights along the pole. These holes will be used to attach the bird feeders.
- Attach the Bird Feeders: Screw the bird feeders into the pre-drilled holes. Ensure they are securely fastened and stable.
- Optional Weatherproofing: To extend the life of your wooden pole, consider applying a coat of paint or sealant to protect it from the elements.
Tips for Stability and Durability
- Choose a heavy, dense wood like cedar or oak for added stability and longevity.
- Ensure the pole is deeply embedded in the ground and securely fastened to the stake to prevent it from toppling over in strong winds.
- Regularly check the feeders and screws to ensure everything remains secure and intact.
Ⅲ.Tree Branch Bird Feeder Pole
Selecting the Right Branch
When selecting a tree branch for your bird feeder pole, look for one that is strong, sturdy, and has a natural curve or fork. The branch should be thick enough to support the weight of the bird feeders and withstand weather conditions. A branch that is 6-8 feet in length and 2-3 inches in diameter is ideal.
Preparing and Installing the Branch
- Select and Trim the Branch: Once you have found a suitable branch, trim off any smaller twigs or leaves. Ensure the branch is clean and free from pests.
- Install the Branch: Dig a hole in your chosen location, about 2 feet deep. Place the base of the branch into the hole and fill it with soil, packing it tightly to secure the branch in an upright position.
- Secure the Branch: For added stability, you can use a metal or wooden stake. Attach the branch to the stake using screws and a screwdriver, ensuring it is firmly in place.
Attaching Bird Feeders Securely
- Drill Holes: Use a drill to create holes in the branch where you want to attach the bird feeders. Ensure the holes are evenly spaced and at varying heights to attract different bird species.
- Attach the Feeders: Screw the bird feeders into the pre-drilled holes. Make sure they are securely fastened and can support the weight of birds and feed.
- Check Stability: Give the branch a gentle shake to ensure it is stable and the feeders are securely attached. Make any necessary adjustments.
Final Touches and Maintenance
- Consider applying a sealant to the branch to protect it from moisture and pests.
- Regularly clean and refill the bird feeders to keep them attractive to birds.
- Monitor the stability of the branch and feeders, especially after strong winds or storms.
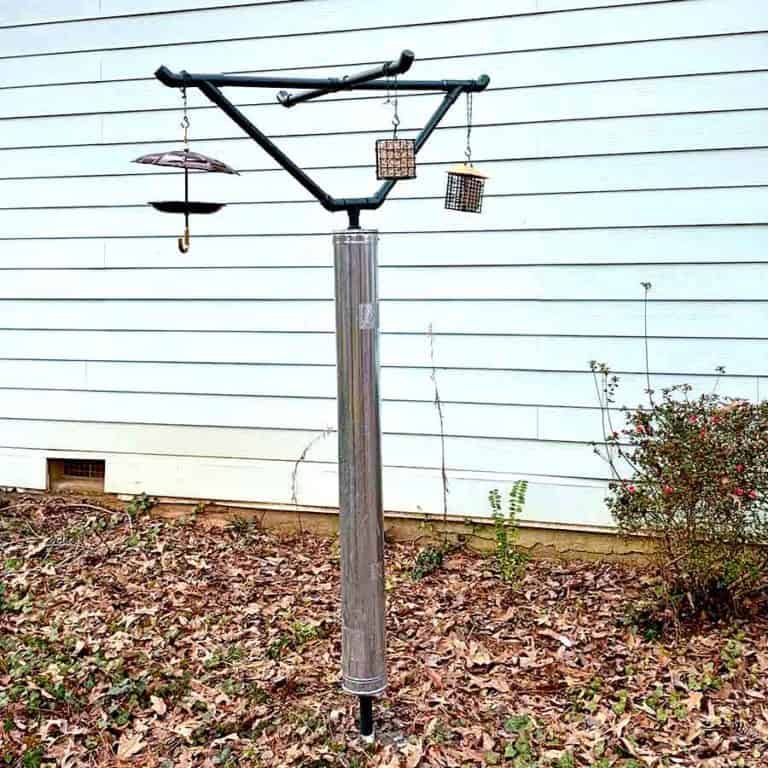
IV. PVC Pipe bird feeder pole
A. Materials and Tools Required
To construct a PVC pipe bird feeder pole, you will need the following materials and tools:
- PVC pipes (1-1.5 inches in diameter)
- PVC pipe cap
- PVC pipe cement
- Measuring tape
- Hacksaw or PVC pipe cutter
- Drill with bits
- Sandpaper
- Primer and paint (optional)
B. Cutting and Assembling the PVC Pipe
- Measure and Cut the Pipe: Determine the desired height of your bird feeder pole. A typical height is around 5-6 feet. Using a measuring tape, mark the length on the PVC pipe and cut it with a hacksaw or PVC pipe cutter. If you want to add multiple feeders at different heights, you can cut additional sections.
- Drill Holes: Drill holes near the top of the PVC pipe where the bird feeder will be attached. Ensure the holes are large enough to accommodate the hooks or screws you will use to hang the feeder.
- Assemble the Pole: If using multiple sections, join them using PVC connectors and secure them with PVC pipe cement. Apply the cement to the ends of the pipes and the inside of the connectors, then press them together firmly.
- Cap the Pole: Place a PVC pipe cap on the top of the pole to prevent water and debris from entering. Secure it with PVC pipe cement.
C. Painting and Finishing Touches
- Sand the Pipe: Lightly sand the surface of the PVC pipe to create a smooth finish and to help the paint adhere better.
- Prime and Paint: Apply a coat of primer suitable for plastic surfaces. Once the primer is dry, paint the pole with a color of your choice. This not only enhances the appearance but also adds a layer of protection against UV rays.
- Final Assembly: After the paint is dry, assemble any remaining parts and ensure all connections are secure. Your PVC bird feeder pole is now ready to be placed in your yard.
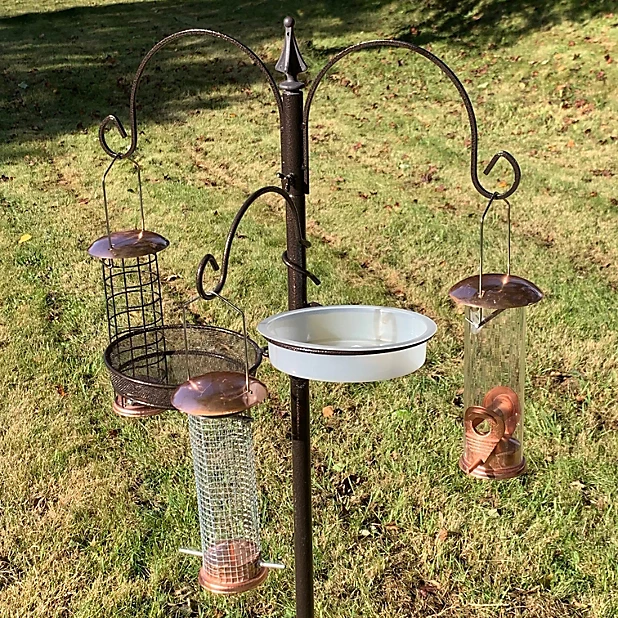
V. Metal Pipe Bird Feeder Pole
A. Choosing the Right Metal Pipe
When selecting a metal pipe for your bird feeder pole, consider the following factors:
- Material: Galvanized steel or aluminum pipes are excellent choices as they are durable and resistant to rust.
- Diameter: A pipe with a diameter of 1-2 inches provides sufficient strength to support the weight of the bird feeder.
- Length: Choose a length that will position the bird feeder at a suitable height, typically 5-7 feet above the ground.
B. Assembling and Securing the Pole
- Prepare the Ground: Select a location in your yard that is visible and accessible to birds but away from predators. Dig a hole approximately 2 feet deep to anchor the pole securely.
- Insert the Pipe: Place the metal pipe into the hole and fill it with concrete or gravel to stabilize it. Ensure the pole is vertical by using a level.
- Secure the Feeder: Attach hooks or brackets to the top of the pole to hang the bird feeder. Drill holes if necessary and secure the hardware with bolts or screws.
C. Weatherproofing the Metal Pole
- Clean the Pipe: Wipe down the metal pipe to remove any dirt or grease.
- Apply a Protective Coating: Use a weatherproof sealant or paint designed for metal surfaces to protect the pole from rust and corrosion. Apply multiple coats if necessary for added durability.
- Regular Maintenance: Periodically inspect the bird feeder pole for signs of rust or damage. Touch up the paint or sealant as needed to maintain its protective barrier.
VI. Bamboo Bird Feeder Pole
A. Benefits of Using Bamboo
Bamboo is a sustainable and eco-friendly material that offers several benefits for constructing a bird feeder pole:
- Lightweight: Easy to handle and install.
- Durable: Strong and resistant to weather conditions.
- Aesthetic: Provides a natural and rustic look to your garden.
B. Construction Process
- Select Bamboo Poles: Choose bamboo poles that are at least 2-3 inches in diameter and 6-8 feet long. Ensure the poles are straight and free from cracks.
- Cut to Size: Using a saw, cut the bamboo poles to your desired length.
- Prepare the Base: Dig a hole approximately 2 feet deep to anchor the bamboo pole securely. Place the pole in the hole and fill it with soil or concrete to stabilize it.
- Attach the Feeder: Drill holes near the top of the bamboo pole and insert hooks or nails to hang the bird feeder. Secure the hooks with twine or wire for added stability.
C. Maintenance Tips
- Regular Inspection: Check the bamboo pole periodically for signs of wear or damage. Replace any damaged sections as needed.
- Weatherproofing: Apply a coat of outdoor varnish or sealant to protect the bamboo from moisture and UV rays. Reapply the sealant annually to maintain its protective layer.
- Pest Control: Treat the bamboo with a natural pesticide to prevent insect damage. Avoid using chemicals that could harm the birds.
By following these steps, you can create a sturdy and attractive bird feeder pole using PVC, metal, or bamboo. Each material offers unique advantages, allowing you to choose the best option for your garden and birdwatching needs. Enjoy the beauty and activity of birds visiting your feeder, and take pride in knowing you provided a safe and welcoming space for them.